

I had several customers come into the Department Store I worked at and would always say the same thing...... I need a lipstick that is easy to apply, doesn't ball up after a few hours, would wear evenly and would be a long-wear. "You are in luck!" I would say." I have the perfect thing for you!". I would lead them to the Nars lip pencils. They are chubby sticks of goodness that embodies all of those requests, and I personally have a pretty appalling collection of them myself. When I fall in love with something so hard like these pencils, I literally want to own every one!!! Even though I don't own all of the dozens and dozens of colors that they have, I still own a majority of them. You can use them as a lip liner, lipstick, lipstain and gloss (depending on the formula). They glide on effortlessly and you can sharpen them with a traditional cosmetic sharpener (the larger hole). I will literally apply in the morning; eat and drink all day; and only have to reapply once more for a fresh look. The color wears off pretty evenly compared to other lipstains and lipsticks. These babies don't budge! I usually line my lips first, then fill in the center to apply. There are definite differences between the formulas and wearability between them that I will explain. The three formulas are; Satin, Velvet Matte and Velvet Gloss. 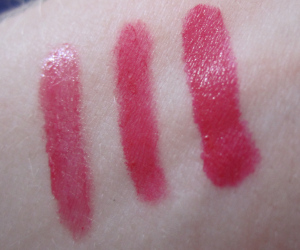
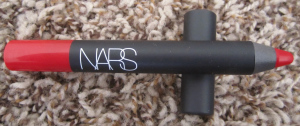
Left to right: Velvet Gloss, Velvet Matte, Satin
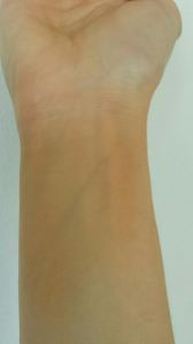
 The satin is my favorite formula out of all three. They are the longest wearing, with the perfect amount of shine to them. In the swatch on my wrist above, the shine almost looks more than the shine in the gloss sticks. The shine tones down after a little bit of wear and settles with the perfect amount of shine. The color is so pigmented. This collection has some of my favorite colors in it as well. Velvet Matte Velvet Matte is just that.... matte with no shine. These are for people that like more of a soft and natural look, or just prefer matte. I like to use a matte lip when I am trying to play up my eyes. Beautiful colors and wear very long. The only downside is that these can feel dry on the lips. I had several customers that requested matte and they looked stunning in these pencils. Velvet Gloss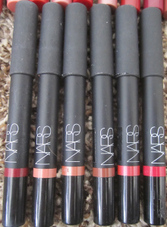 The Velvet Gloss pencils are perfect for those non-precision quick application days, or if you just want a glossy look. They are the glossiest out of the bunch with the most shine. They are also the most moisturizing. Most of the darker colors are extremely staining and will stay on all day (like the popular Mexican Rose). Even the lighter colors are pretty pigmented. I love how these feel on my lips. The only downside to these, is that the shine and pigmentation can vary from color to color. I would recommend trying these out at your local Nars counter. 
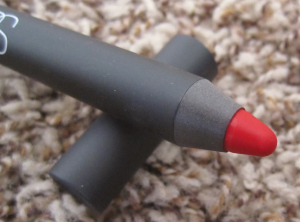
Nars Satin Lip Pencil in Luxembourg
Where To Purchase: Nars Satin Lip Pencil $25 and the Nars Final Cut Limited Edition Colors Collection $25 Nars Velvet Matte Pencil $25 Nars Velvet Gloss Pencil $25 ***The opinions expressed in this post are just my own personal opinions. I am not endorsed and do not get paid to express my opinion about this item*** 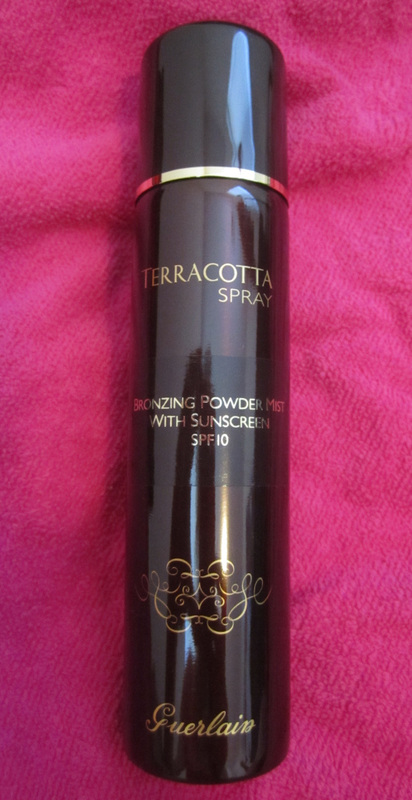
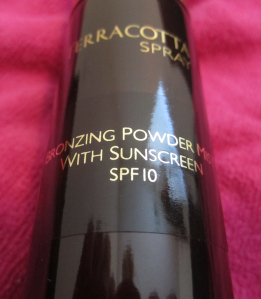
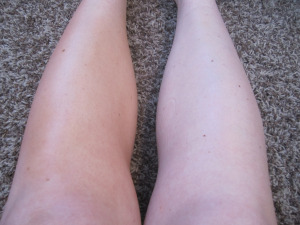
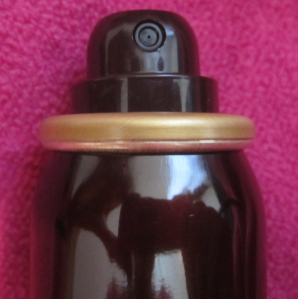
The Guerlain Terracotta Bronzing Powder Mist Spray is by far the best all-around face bronzing product I have ever used, and I have used many. When I buy a self-tanning product, I would usually buy the separate face product to go with it, since I am so acne prone. Even though the bottle would state, "Non-comedogenic" I would still break out regardless, so I just gave up the whole idea of being able to use self tanner on my face, and would make up for it using powder bronzer on top of my foundation. At the end of the day, the bronzer wore off, and would leave me ghost-faced (since I have such fair skin naturally). I have always loved Guerlain bronzers since they are so natural and true in their color. Because I am so fair, it is hard to find products that don't turn my skin into a muddy-looking, orange fake mess. My friend at work that manages the Guerlain counter used this on me one day, and I was hooked! I couldn't believe how light and airy the formula was! Not sticky, not smelly, and very easily applied. Since this is an airbrush application product, it is very easy to use and can blend out nicely. I will either spray it directly onto my skin in light sweeping motions and blend it out with a brush, or I will spray directly onto a flat top kabuki brush and blend it out. Once you spray it on, there is a little bit of time to work with it. Once it is on the skin for about 5-10 minutes, it is stuck there for the day. It will wash off with soap and water. It was made to be a temporary bronzer, and I love it that way because it does not clog my pores while it is on, and I can wash it off with the rest of my makeup at the end of the night. There are two colors in this product. Shade 1 (lighter), and Shade 2 (darker) with an SPF 10 in it for a bit of sun protection. This formula almost sprays out like a liquid, but blends out to a powder. It is hard to explain, so I recommend going to a Guerlain counter to try it. Since this is a powder, you can also blend out it with your hands. I like using a brush for a more blended out finish. Even though it is a bit pricey, a little goes a long way, and I have been using mine almost every day for months on my face and chest. I wouldn't recommend it for the whole body, or you might be buying a new can every other week. Where to purchase: Guerlain Terracotta Bronzing Mist $62 with free shipping HERE
***The opinions expressed in this post are just that. I am not affiliated, nor am I endorsed by any brand or product*** 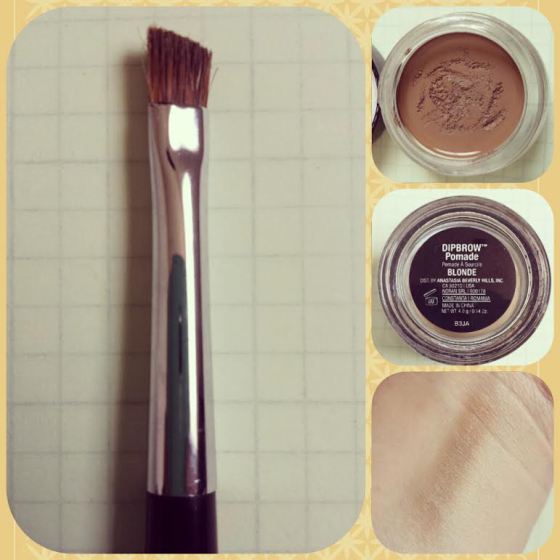
Trying to get my hands on one of these jars of Anastasia Dipbrow several months ago was an absolute nightmare!!! Upon it's release, the company didn't expect this jar of brow pomade to rock it, and rock it hard it did!!!! Most colors were sold out, but the blonde was especially popular and they were sold out worldwide everywhere! Even the tester at Department Stores were all out so I couldn't even try it. I am embarrassed to say that I paid triple the amount as the retail price to get my hands on one (the only one left on eBay). They had been out for months and I wasn't sure when they would get restocked. I didn't want to do a review until they were available to purchase again. The Dip Brow comes in a glass jar with 0.14 ounces of goodness inside. The product itself is a nice cream consistency. The blonde shade has a perfect mix of mainly cool tones with a little dash of warm to look completely natural on a blonde person. My hair is so naturally light, that I have to keep my brows lighter as well, and most products or pencils wear off after a few hours or so leaving me with little or no brows, but this stuff is completely waterproof!!! You have a minute or so of play time to fix any mess-ups or to blend in, but once it has set, it's SET for the day until it gets washed off. I actually use my Anastasia Brow Wiz pencil in Ash Blonde to use as a base before I apply my Dip Brow so that I don't have to worry about messing up the Dip Brow and having crazy brows for the day. I like to use a stiff angle brow brush to apply. I simply just dip the tip in gently once or twice and gently go over my brows. The formula also acts like a gel holding the brows in place. If you apply too much, your brows might stick together a little bit, but you can just take a brow brush and just brush them out quickly. I apply the residual amount from the brush to the inside portion of my brows to fade them out naturally. The Dipbrow is very easy to use and very quick. The color is very pigmented so a little bit goes a long way. I would have to say that I will probably use this product as long as it's on the market, and for $18 you can't beat that. My Rating: A+
***This is not a paid or endorsed review. Just my own personal opinion*** 
I wanted to have those big, bold and beautiful lashes just like everyone else, but they didn't come without a price......... my eyes were too sensitive for them. I started out wearing falsies, but every glue I had ever tried just made my eyes itch, burn and incredibly red. I always struggled keeping the eyelashes adhered because my eyes would water so much and dissolve the glue. No matter how beautiful the lashes looked, no one looks good with bloodshot eyes. I turned to eyelash extensions. They were so beautiful! It also took many hours to do, and a lot of discomfort with strong glue fumes so close to my eyes for hours while they were getting placed. I can't believe I actually had them done for 7 months with so many negatives. I always felt like I had something in my eye. I couldn't open my eyes very much the first few days after getting them done every few weeks because my eyes would hurt and water too much. Also, you can't rub or touch your eyes much, and since my eyes and eyelids were constantly itchy, it was dreadful! Washing your eyelids was next to impossible because once again, you can't touch or rub your eyelashes. After a few weeks, when the eyelashes would start falling out, I would catch one of those lashes in my eye, and that was probably the worst eye pain I can remember (even more than getting Lasik). Also, the eyelashes would start turning different directions and go down into my eye. My eyes never stopped being red and itchy all the time. I finally let them all fall out on their own, and took all of my own eyelashes with them. I literally had stubs for eyelashes, and people would ask me if that is how my lashes always were. Out came the money from my pocket again to invest in a good lash grow serum. I was working for Nordstrom in cosmetics, and the Trish McEvoy Lash Conditioner was suggested to me. I shelled out the $125, and used it faithfully for months. The only side effect I had was a little tiny burn on the lid after applied, but quickly went away. My eyes didn't react negatively thankfully. It is more of a natural lash enhancer, so I didn't get the huge eyelashes I was looking for, but the great thing about this enhancer is that you grow many new lashes to make them thicker. They didn't necessarily grow that much longer, but if it's thickness you are looking for, this one is your baby. I had seen really great results from a girl I worked with using Lilash Purified Serum. I bought it and used it for about a month and a half with great results, until my eyes rejected it. My left eye started going blurry and my eyes were in pain all the time. They also got really dry, and I was using eyedrops several times a day. I went in to the Eye Doctor, and he saw nothing wrong with my eyes, and suggested that I was probably allergic or really sensitive to the preservatives. I had finally gotten the results I wanted without side effects and now I couldn't do this anymore. He suggested trying the serum with a histamine blocking, anti-allergy eye drop that you can buy from the store for about $10 - $12 called Alaway. 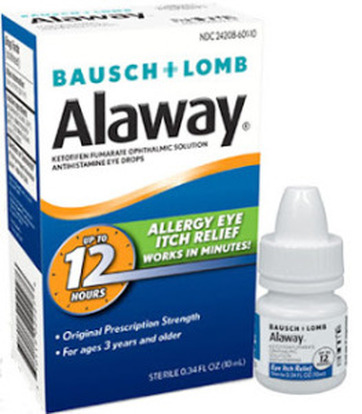
It used to be a prescription, but now it is OTC, and it works so great! I put the drops in right before I apply Lilash at night, and I have no symptoms! I apply it again first thing in the morning (recommended). I am now back to growing out my lashes again with no awful side effects. If you are struggling with sensitive eyes, than try it. It may not work for everyone, but it is working great for me. ***I am not endorsed by any of these brands or affiliates. The views expressed are my own opinions*** Why Shiseido and Dior Have the Best Foundation Brushes, How To Use and Clean Them Properly8/26/2014 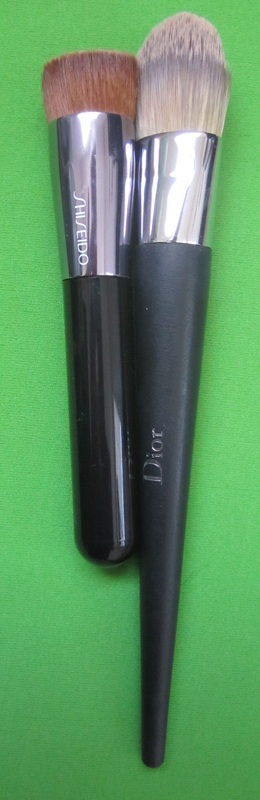
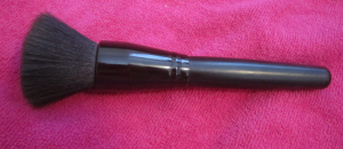
Awww..... Foundation brushes..... There are so many on the market. In my quest to find the perfect one, I found the perfect two. I was a total YouTube makeup blogger junkie before I landed myself a job in the world of cosmetics. I literally wanted to own every product they showed, including brushes. Brushes are so completely overlooked by so many. They make a HUGE difference how things will look, shade and blend. Good makeup brushes are not cheap (although I have found a few inexpensive gems), but a good foundation brush is a really great investment. If you treat it well, it will last a very long time. I always choose synthetic bristle brushes with a liquid foundation. I use to use the MAC 187 and 130 goat hair stippling brushes, but all of the hairs would fall out and stick all over my face. Liquid foundation will pull out the bristles in real hair brushes, because they are are not as strong as synthetic. Also, since you have to clean foundation brushes way more often than other brushes, real hair brushes fall apart so much quicker in this process (especially if the proper techniques are not used) than synthetic brushes. SHISEIDO PERFECT FOUNDATION BRUSH 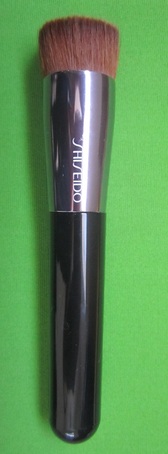
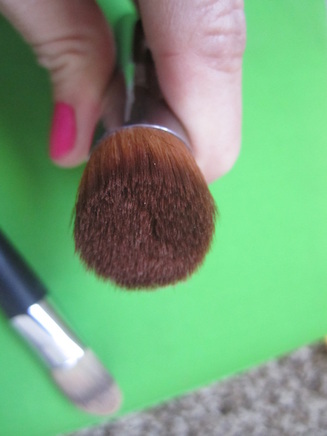
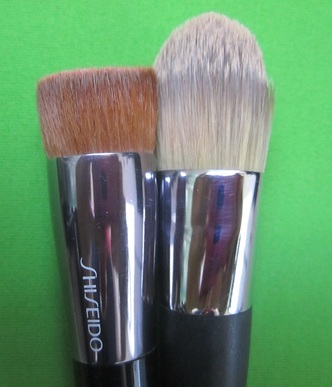
I have tried so many foundation brushes, and none of them seemed to stick out quite like the Shiseido Perfect Foundation Brush. This is my ultimate favorite brush. It's relatively cheap at $30, which is pretty inexpensive compared to other nice brushes that are $45+. Its sleek compact design is a big hit for most, especially to those traveling since the handle is only 4". The lack of length in the handle does not deter the precision that this brush can handle applying foundation. It was everyone's favorite brush to use in customers makeovers in my cosmetics department; we couldn't keep them in stock and we sold out of them many times over. After all, it did win Allure's prestigious BEST OF BEAUTY AWARD for BEST FOUNDATION BRUSH and InStyle Magazines winner in the foundation brush division. It has also won many other cosmetic awards and it is obvious why. The bristles are flat on the top with the perfect amount of density to give the most beautiful airbrush look you could possibly want. You can control the coverage with it although it is definitely my best full-coverage brush. If you want less coverage, than you can just spread the product over a further distance. You use less product with Shiseido's brush because it spreads so much further than what most brushes can do. The bristles angle down, so getting underneath the eyes and the hard-to-reach spots on the face are a breeze. 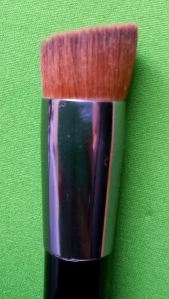
I sold one of these to almost everyone looking for foundation. I would demonstrate how using this brush is so much better than using your fingers, or a saddle brush (standard foundation brush) because getting a good blend with the fingers takes a lot of time and product and is not very hygenic, and using a saddle brush scoots the product around the face creating an uneven coverage, look and lines. I also demoed how much further your foundation can go with a brush. You can see my demo with a really crazy color to demo below: 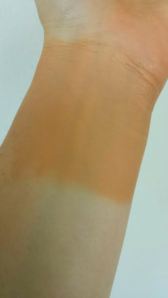
Blending with my fingers
Blending with Shiseido Foundation Brush
Dior has a similiar foundation brush that looks almost exactly like it with a longer tapered handle (Not the one in my post). When any brand loyal Dior fan would hold and feel both, 9 times out of 10 they would choose the Shiseido brush. There is something to the bristles that just works well. How to use the Shiseido Perfect Foundation Brush: Very Full Coverage: Dot your foundation around your face and use the brush in small circular motions to blend out Standard Full Coverage: Pump foundation directly onto bristles of brush and use in circular motions on face Medium Coverage: I like to pump a dime sized amount of foundation on my wrist, or the back of my hand and dunk the bristle ends of the brush very lightly in the foundation and blend out on face in larger circular motions DIOR BACKSTAGE FOUNDATION BRUSH 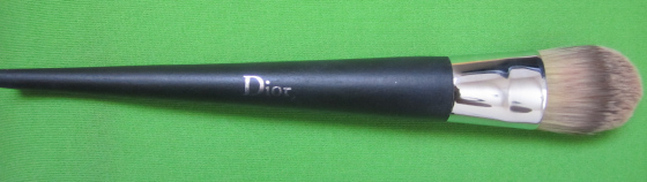
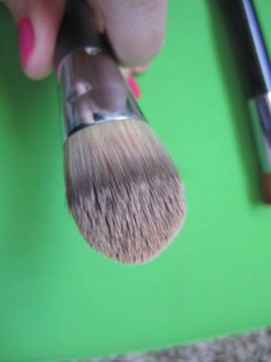
My second favorite is the Dior Backstage Foundation Brush. It looks like standard foundation brush from the photo, but it's not entirely flat as it appears, it has a full amount of bristles that are longer. 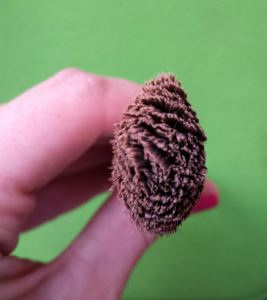
This brush is perfect for light to medium coverage foundations. I mainly use this brush in the summer when I want a lighter coverage and finish. Instead of circular motions like the Shiseido brush, you use short sweeping motions (like a paint brush) for your foundation. It has a long tapered handle with synthetic bristles. The bristles are so soft and start out with the longest bristles in the center and taper down the sides for the perfect finish. It is a little pricier at $45, but definitely worth it. 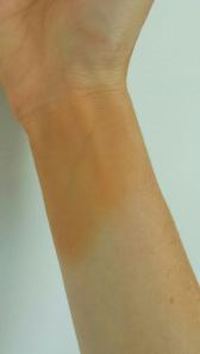
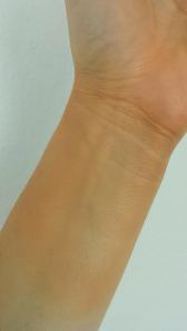
Blended with fingers
Blended with Dior Foundation Brush
How To Use the Dior Backstage Foundation Brush: Light to Medium Coverage: I like to pump foundation out on the back of my hand or wrist and dip the end of the bristles in the foundation and sweep onto my face like a paint brush up and down and side to side. I will stick one layer on for light coverage. If I want more coverage, I will put another layer on top of the first layer. How to clean foundation brushes: The best way to clean this brush is to buy a brush cleaning solution to soak it in. My favorite is MAC's Brush Cleanser because it removes extra makeup and residue, disinfects and conditions the brush. I take a paper cup and pour a small amount in the bottom, and put the brush bristles down to soak for a bit to dissolve the foundation (since foundation can stick itself pretty good in the dense fibers), and after an hour or so, I will put a small amount of baby shampoo, regular shampoo, or even my Bath & Body Works Antibacterial Soap in my hand and swirl the bristles around for a little bit to get all nice and soapy. I rinse it by letting the water drain over my hand while I am still swirling. I might repeat if it is really dirty. TIP: There is usually a metal ring on the handle of your brush by the bristles, NEVER get the the top of the ring (where it attaches to the handle) wet!!! That is where your bristles are glued to the brush, and getting it wet will dissolve the glue over time, and the brush will fall apart. I like to shake the brush out to get the water out and lay it on a towel or a flat surface with the bristles hanging over the edge to properly dry. Once dry, you can reshape the bristles by running over your hand a few times. Where To Buy: Shiseido Perfect Foundation Brush $30 + Free Shipping Dior Backstage Foundation Brush $45 + Free ShippingMAC Brush Cleanser $15 + Free Shipping ***I am not endorsed and do not get paid by any brand or any affiliates, the opinions expressed are my own*** 
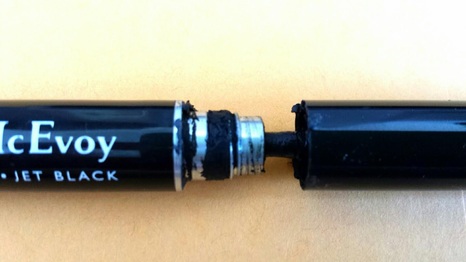
Ok ladies....... I know this can be a problem for anyone using mascara. Flaking? Fallout? Transfer? For the longest time I would put the best makeup look together and feel so accomplished.... only for those feelings to be dashed when I look in the mirror a few hours later, and it looks like I had applied mascara directly to my skin. Raccoon eyes. The constant worry and wiping all of the time doesn't help your confidence or eye wrinkles. This problem only occurred from the mascara on my lower lashes. I couldn't wear any and feel very confident about it. There was a mascara the Department Store I work for sold from Trish McEvoy called the "Lash Curling Mascara." It is a tubing formula (rather than a coating formula) that actually forms tubes around the eyelashes that do not smudge, flake or transfer onto skin. It was a different concept for me indeed. I tried it on my lower lashes and LOVED IT! I am happy to say that I don't ever have to look in the mirror again if I don't want to during the day to make sure I don't have raccoon eyes. It looks like a regular tube of mascara with a standard size bristle brush. You use it much the same as regular mascara and you can layer it as well. The only difference, is that in taking it off, you can actually pull the individual tubes off with a bit of warm water (I like to warm a washcloth and hold it over my lids for a few seconds before I slide the tubes off). No soap needed in a time crunch. I like to take mine off the same as regular mascara with soap, water and light scrubbing as with removal of any mascara. There is also another tubing mascara from Trish called "High Volume Mascara." The brush is so small and literally grabs every single lash from every corner possible from your eyelash line. It is perfect for the lower lashes as well. For some reason, I like the bigger wand on the "Lash Curling" formula. Now that I have told you all of the good, there is also a bad side: This mascara is definitely not waterproof. Tearing up a little bit is ok, but when I cry (the sobbing kind), the little tubes slide off onto my face, but I really don't cry like that often, so I have nothing to worry about. I wear this every day on my lower lashes. I like different formulas for my upper lashes, but works like a charm on my lower lashes. The formula also tends to get built up in a thicker clump on the threads of the tube, and the bottom of the wand. No worries, just scrape/wipe it off and it's good to go. I haven't done it in awhile, so I used my opened tube to demo this fact. 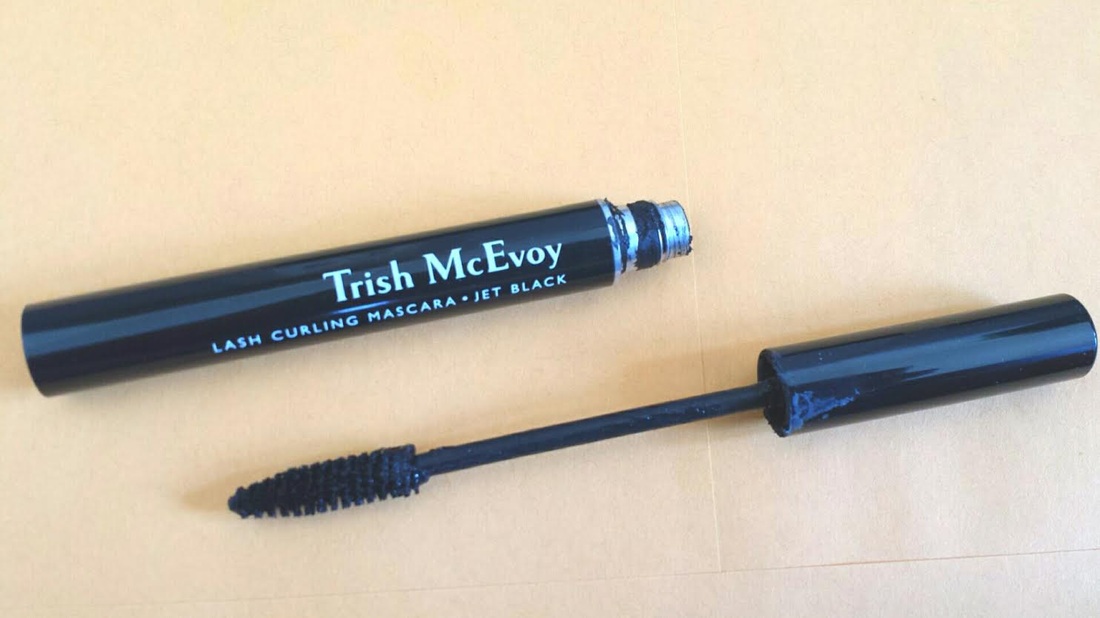
If you tend to "pump" your mascara wand in and out really fast to get the most mascara on the brush, this is not the formula for you. First off, you should change that habit with ANY mascara. It will dry it out so much faster! Always swirl the brush around the tube inside to get the most on and save your mascaras from drought. If you feel as though it is drying out, you can always drop a drop or two of an eyedrop (saline solution) in the tube and then pump the mascara to get it all nice and wet again for more uses (only time I will say to pump the mascara).
I sold so many of these to customers having the same issues whether for the top lashes or bottom; this mascara definitely has a cult following. It is pricey at $31 a tube, but sooooo worth the confidence and less fuss, and your lashes will love you for it! Call your local Nordstrom and ask them when their Mascara Madness is (It's twice a year). Great time to buy it with buy 2 get 1 free! We would sell out of these gems during that time they were so popular! Where To Buy: Trish McEvoy Lash Curling Mascara (regular brush) $31 + Free Shipping Trish McEvoy High Volume Mascara (tiny brush) $31 + Free Shipping ***I am not endorsed by Trish McEvoy or affiliates and do not get paid. The opinions expressed are my own and my personal experience*** |
|


 RSS Feed
