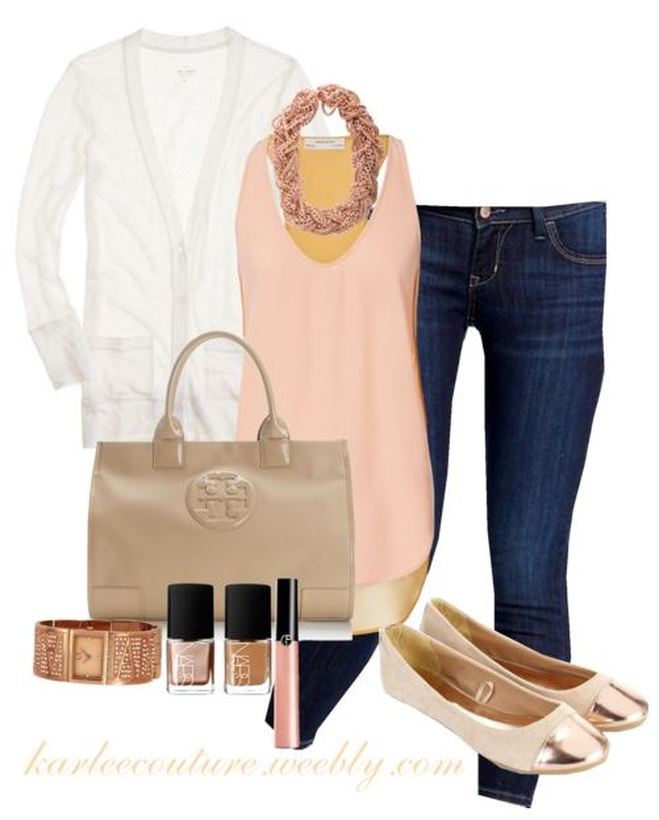
 Cardigan: J.Crew Whisper Linen Cardigan $49.50 (On Sale) HERE
Top: Zara Two-Toned Top $35.90 HERE Crop Jeans: Old Navy "The Rockstar" Crop Jeans $25 (On Sale) and get an additional 20% off online code ONTAKE20 Ends 06/01 HERE Handbag: Tory Burch Ella Tote $250 HERE Watch: Armani Exchange Rose Gold Bangle Watch $145.41 (On Sale) HERE Necklace: Will not ship to US. Link to website anyways HERE Nail Polish: NARS Limited Pierre Hardy Set - Easy Walking $29 HERE Lip Gloss: Giorgio Armani Gloss D'Armani $29 HERE Shoes: Accessorize Milly Metallic Toe Ballerina Flats $48.50 HERE
0 Comments
Besides getting a long-lasting foundation, there are a few things you can do to keep your foundation lasting longer than it usually would. I do this in a two-step process. 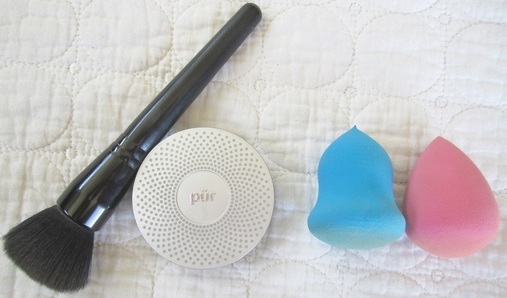 STEP 1: The first thing to use after you have applied your foundation and concealers is a finishing powder. This can be just a regular face powder; other names for this is setting powder and finishing powder, or translucent powder. I typically stay away from a translucent powder, because although it says it is translucent, the powder is a chalky white color which washes me out, and settles into my pores in the oily part of my combination skin, and it looks like I have some horrible spotted skin prolem. I am constantly checking my skin so that I can rub the powder back in when it starts settling. That does not make for a fun day. The foundation I typically use (Make-Up Forever in shade N120) is a bit lighter than the rest of my body, so I typically choose a powder that is slightly tan to use as my finishing powder.
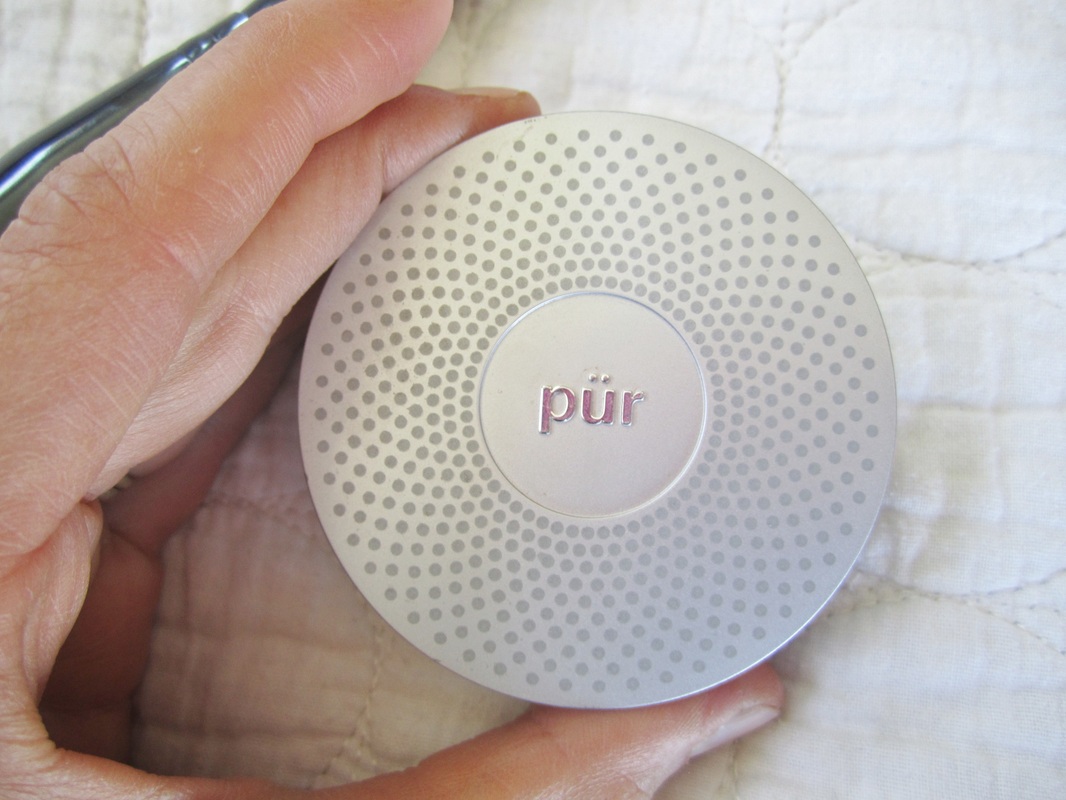
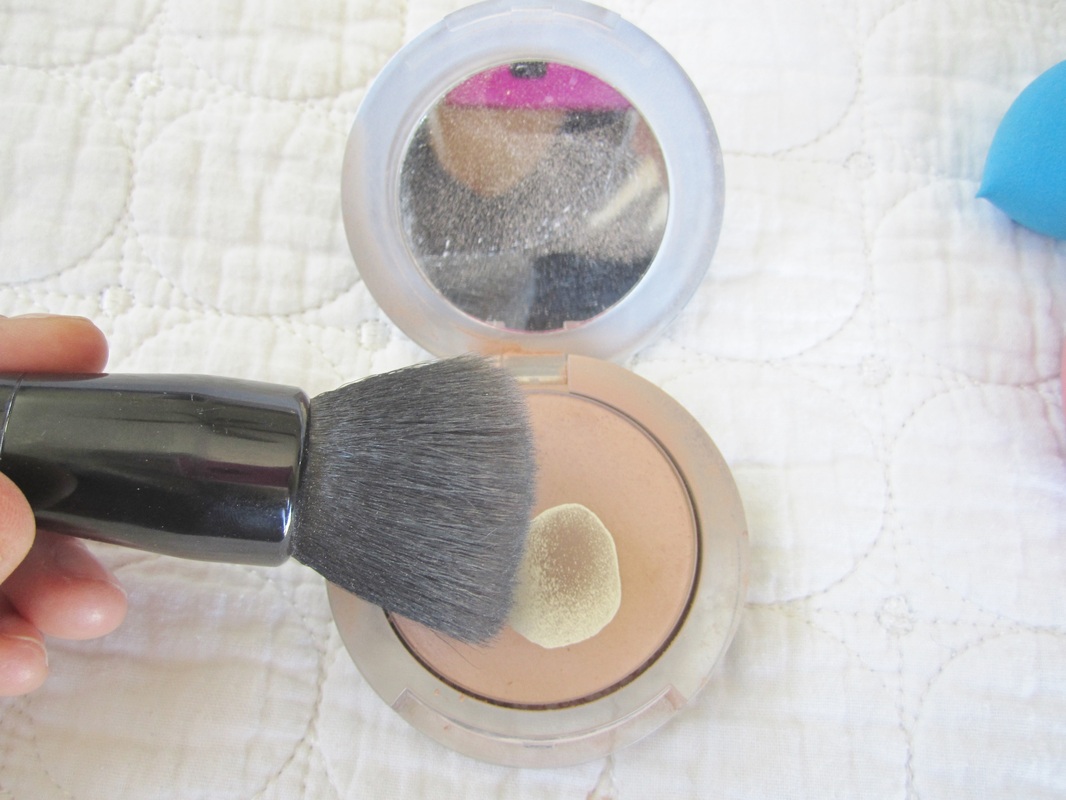
I use a colored mineral powder foundation (Pür Minerals 4-in-1 Pressed Powder in Blush Medium), but I apply very little, just enough to cover my face. I apply very sparingly under my eyes so that the powder does not get cakey and showcase my under-eye wrinkles. I apply my whole face using the E.L.F. Powder Brush using large circular motions. What this does, is stick to your concealer and foundation and seal it all in. Like I have said before, I have combination skin, so I have really dry areas of my face that gets a bit powdery, and other parts of my face is slightly oily and absorbs the powder. What I am trying to achieve is even looking skin with no cakey powdery spots. Here is where the next step perfects everything..... STEP 2: I have two small beauty blending sponges. I am showing both, but I alternate each day between them for cleaning purposes. One is not better than the other. They both work the exact same. 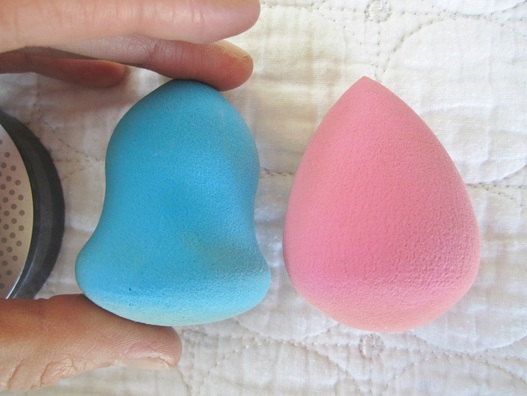 The blue one is a bell shaped brush that has a flat end on one side, and a pointed end at the other with a small indent around the middle. The pink one is a teardrop shape sponge. They are essentially the same thing as the Beauty Blender® just with a different name, and a oodles cheaper. This is the last step for foundation application. This step is the perfecting portion, and the beauty sponge helps prolong your foundation even further. You wet the sponge, and slightly squeeze the excess water out, until it is pretty damp still, and use the sponge to dab and roll all over my face. I like to dab around my eyes (with the pointed end), in-between my eyebrows and underneath my jaw line (with the large end), but I will roll it on it's side everywhere else on my face. The sponge adds a little bit of moisture, melting the powder and foundation together for a really even application, and takes away that powdery look from the finishing powder. I apply my bronzer, blush and highlighter after (Just my preference), but you can apply all of that before you use the sponge. You can even use this little sponge to apply your foundation directly to your face. You can dab it on with the large end and blend it, or you can dab it on, and use a stippling brush (MAC 130) to blend it in. Cleaning it is easy. Just use a little bit of antibacterial soap and squeeze it in the sponge, and run it under water continually squeezing until the water runs clear and lay on a terry towel to air dry.  Flawless finish after using the finishing powder and beauty sponge Items Shown: E.L.F. Powder Brush $3. You can purchase this at Walgreens, Target, KMart, etc.... Pür Minerals 4-in-1 Powder $27 Free Shipping. Purchase HERE Winstonia Beauty Sponge in blue $6.25 Free Shipping. Purchase HERE *** I am not affiliated in any way with other people mentioned or products
mentioned. This is my own personal review on this purchased item*** DON'T FORGET TO ENTER THE MILANI EYE LINER SET GIVEAWAY!!! HOW TO ENTER: Click on the link HERE, and like my Facebook page . Write MILANI GIVEAWAY under the comment section of the giveaway post in my feed Entries are open until June 4. Winner will be selected and announced on June 5, 2013! 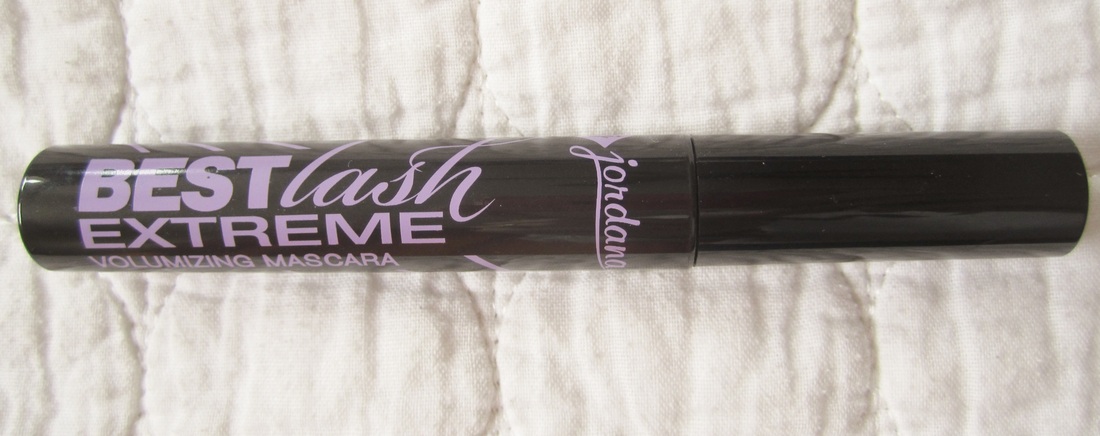
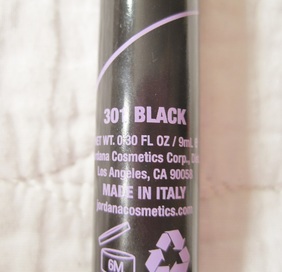
I had heard about this mascara from one of my favorite youtube beauty channel guru named Laurenbeautyy. She consistently uses this mascara, and she has some gorgeous natural lashes. I was a bit skeptical, because my favorite mascara has been Dior Diorshow, but at $30 a pop, it is not the cheapest mascara, and I had to layer on several coats to get the "look" I wanted. I like more dramatic eyelashes. I have tried just about every drugstore brand mascara, and they were always just ok. I am actually really excited about this one! I have had lash extensions for a long time, and decided I was not going to get them anymore, because I am severely allergic to the glue, and my eyes do not appreciate them. I wanted a mascara to mimic that look, and was not sure this one would work for me. I love that it is Made In Italy. Everything made in Italy seems to be quality, and I love when my cosmetics are made there, rather than China, with unknown chemicals and ingredients. The wand is a small wand with tiny bristles, but definitely packs in the mascara. I was pleasantly surprised at how little application I have to do to get my desired look. If you want to layer the look, you have to wait a little for the mascara to dry, because it's a fairly wet formula, but gives that voluminous look when layered. It's better to move the wand on a side-to-side motion rather than up and down, because the eyelashes will clump. I think this mascara is just as good as Diorshow, and it is something I will be using from now on. Rating: A You can purchase this mascara at most Walgreens. Just hop onto their website HERE, and check the stock on it in your area to see if they carry it. If you are near Bountiful, all of the Walgreens carry this particular mascara, and it is only $2.99
*** I am not affiliated in any way with other people mentioned or products
mentioned. This is my own personal review on this purchased item*** 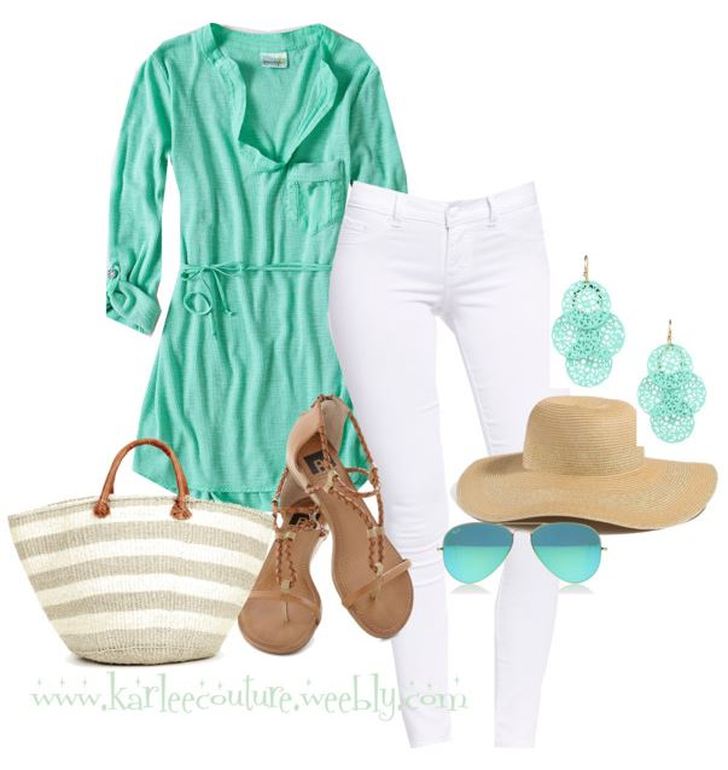 Top: Anthropologie Fluttered Tunic Henley in Mint $58.00. Purchase HERE
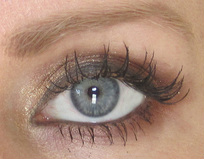
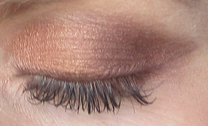
Pants: 2b Colored Jetsetter Jeggings (with several different colors) $39.95. Purchase HERE Handbag: Solesociety Avianna Large Tote $69.95 (Get 20% off your first order). Purchase HERE Shoes: Modcloth BC Desert Stroll Sandals $49.99. Purchase HERE Earrings: Lori's Pastel Filigree Earrings $10.95. Purchase HERE Hat: Guess Floppy Hat with Metallic Trim in Sand $35.00. PUrchase HERE Sunglasses: SunglassesshopRay-Ban 3025 Matte Gold 112/17 $152.10 (Get 10% off your first order). Purchase HERE 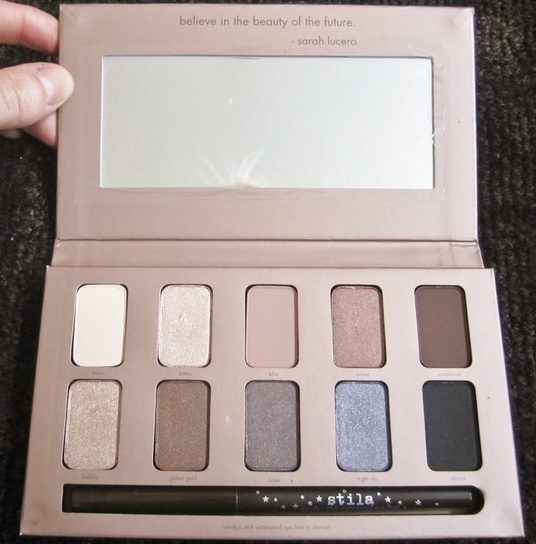  I am so in love with this pallet I had to write about it. This is the Stila In the Light Pallet. I had never owned anything Stila, and I have heard really good things about it, so when I was at Ulta, I decided to pick one up. I know when an eye shadow is a good one, because when I put it on my finger, I can see how pigmented it is. Stila is definitely on my radar for one of the best in eye shadows. I am usually skeptical of eye shadow pallets, because I feel when they put more product into something like a pallet, or a set, the quality is usually not as good, but this one definitely takes the cake I own several Urban Decay eye shadow pallets (which are known to be really good) and it still did not have the same quality. I even like the quality better than MAC, Nars and Smashbox. The eyeshadows are so creamy and smooth when applied. They are also so blendable, and the colors are pretty neutral, but still contain a few colors to create a smokey eye look 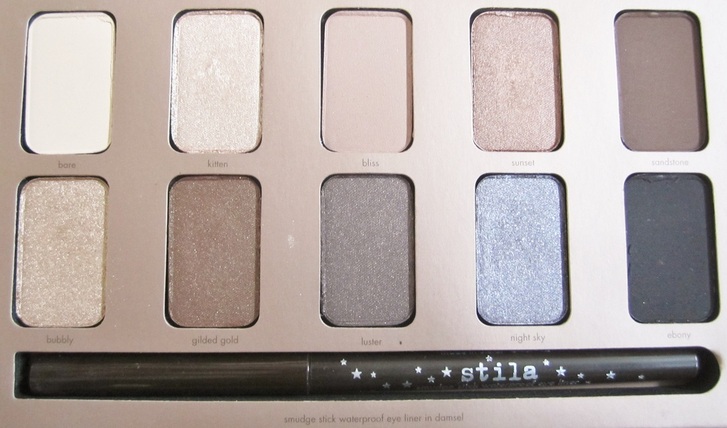 Top Left to Right: Bare, Kitten, Bliss, Sunset, Sandstone Bottom Left to Right: Bubbly, Gilded Gold, Luster, Night Sky, Ebony 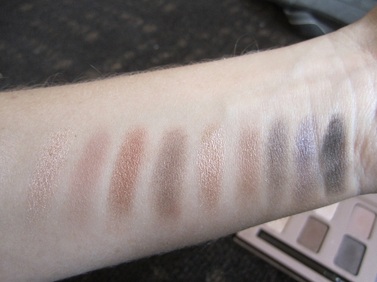 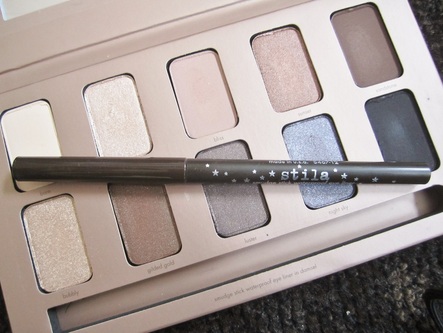 Another great part about this pallet is that it comes with a full-sized Smudge Stick Waterproof Eyeliner in Damsel (Dark Brown). I did the swatch this morning on my arm, I have since tried to rub it off with my finger, went on a strenuous bike ride, and did an hour of Zumba, and it still did not sweat off or budge! The eye liner is very creamy and glides on very smooth! Definitely the same quality as the Urban Decay 24/7 liner. 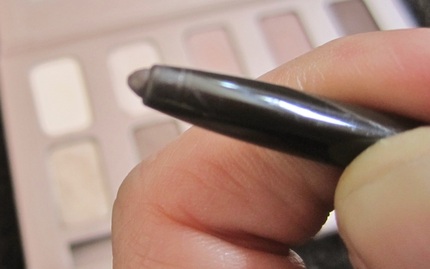 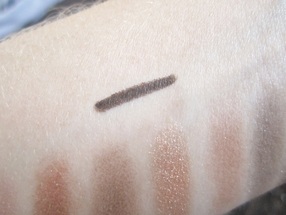 I definitely give this pallet an A+ for quality, blendability, texture, etc..... You can purchase the Stila In the Light pallet HERE for $39.00 and free shipping with online checkout code 100751 *** I am not affiliated in any way with other people mentioned or products mentioned. This is my own personal review on this purchased item*** DON'T FORGET TO ENTER THE MILANI EYE LINER SET GIVEAWAY
HOW TO ENTER: Click on the "Like Me On Facebook" above my picture on the top right side of this page, or click on the Facebook icon on the top right corner of this page, LIKE my Facebook page, and type MILANI GIVEAWAY under the comment section of this post on my KarleeCouture Facebook. Entries are open until June 4. Winner will be selected and announced on June 5, 2013! 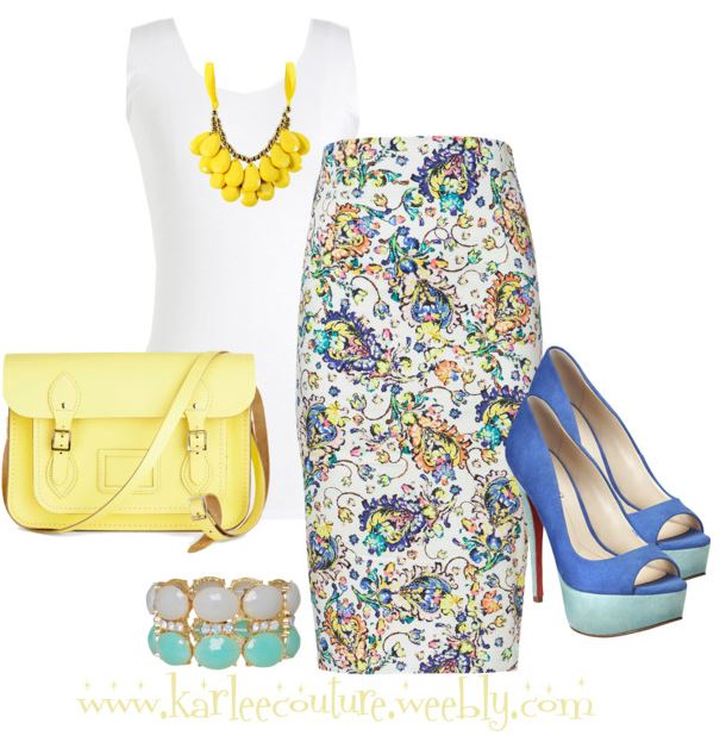 Top: Modcloth.com Tanks Very Much Top in White $12.99. Purchase HERE
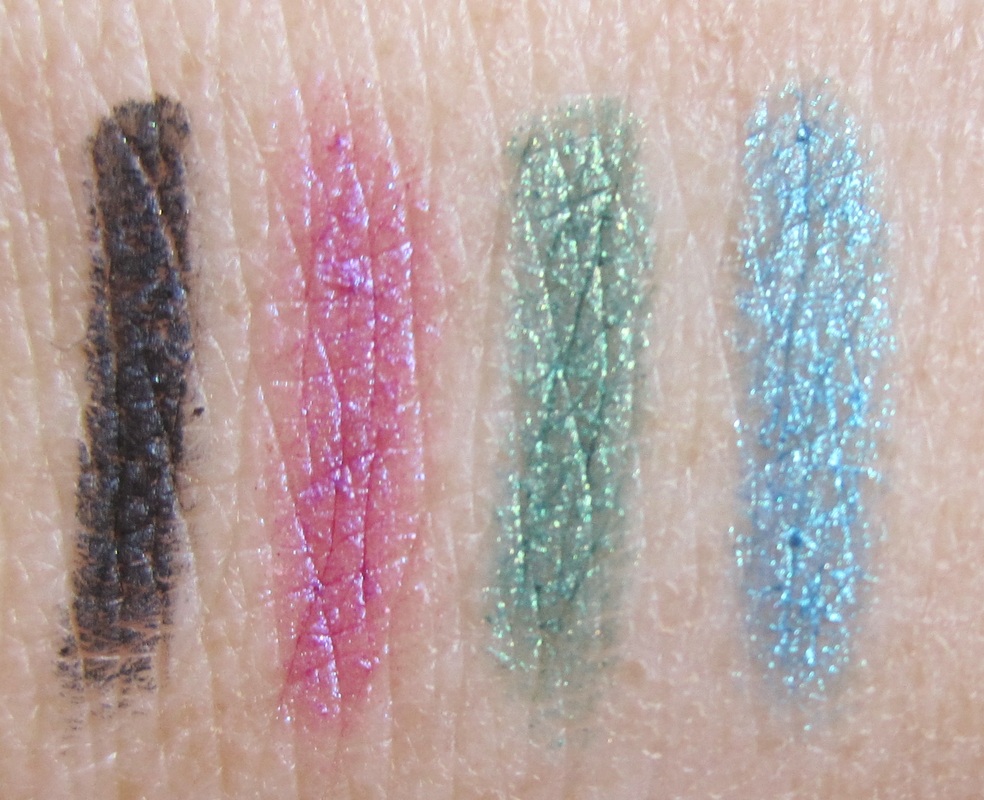
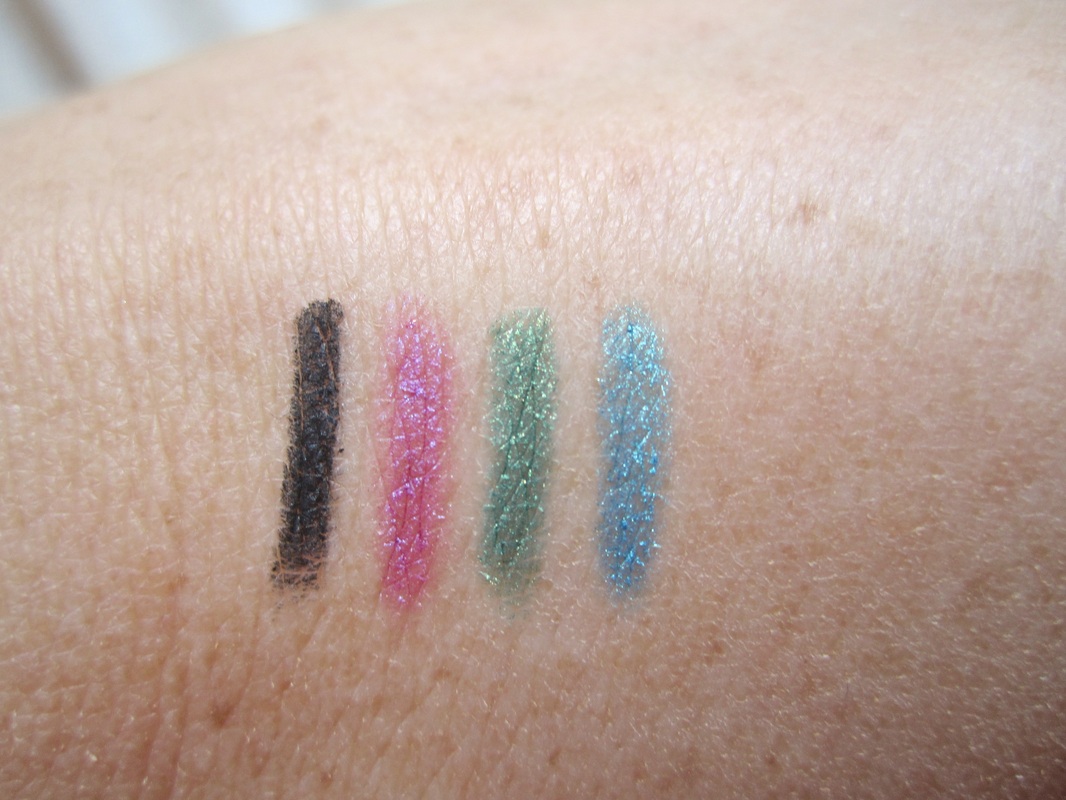
Necklace: Amazon.com AllyDrew Double Layer Chunky Acrylic Teardrop Necklace in Yellow $18.99. Purchase HERE Skirt: Zara.com Printed Pencil Skirt $59.90. Purchase HERE Handbag: Modcloth.com Cambridge Satchel $174.99. Purchase HERE Bracelet: Humblechic.com Sea Stones Bracelet $38.00. Purchase HERE Shoes: Ninewest.com Pammie Boutique 9 Pumps $49.99 Sale. Purchase HERE 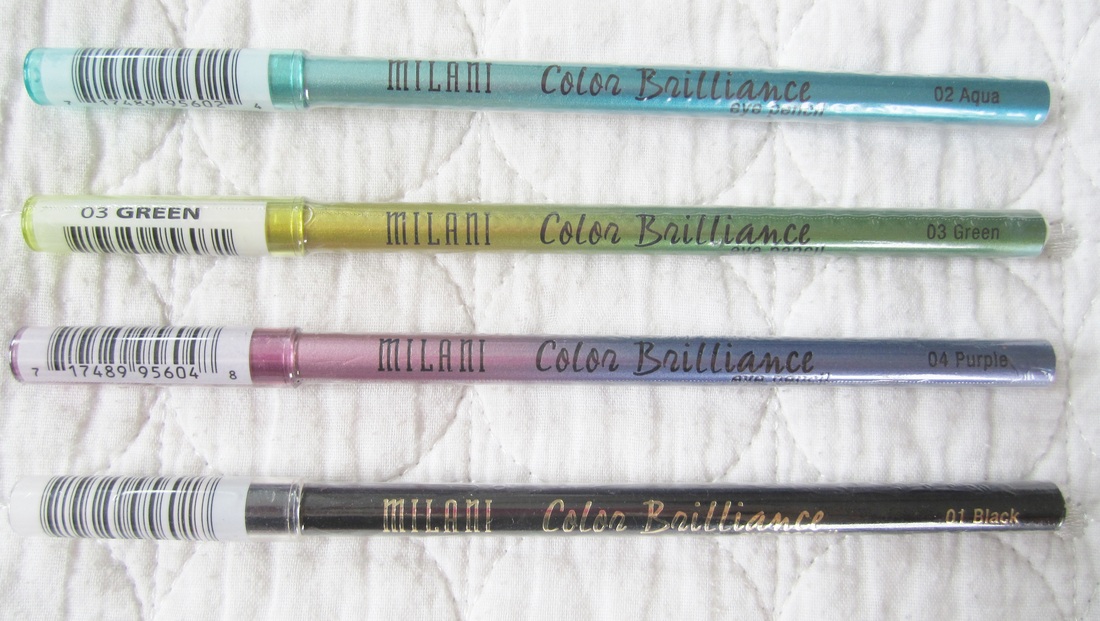 I had purchased these Milani Color Brilliance Eyeliners, to see how I liked them. I saw the aqua eyeliner on another blog, and it looked gorgeous on her, so I decided to purchase all of the colors in the Color Brilliance collection. I love all of the colors they have! They are really pigmented. If you don't want a bright defining line, you can just line it once. If you want a really brilliant color, you will have to sweep your eyelids a few times, but the color builds on itself, and it is just gorgeous! Anything made in Italy excites me, and these little babies are! I would recommend using an eyelid primer (such as Lime Crime or Urban Decay) to keep these from bleeding. These eyeliner pencils are great for smudging! The Urban Decay 24/7 liners (in one of my earlier posts) are great for a definite crisp line, but sometimes you want to smudge the color for a smokey eye. I decided to purchase another set as a giveaway to you guys to say thanks for reading my blog even though I am still very new (A $24 value) Speaking of which, since I am so new, your chances of winning this giveaway are pretty good! See below for details on how to enter. These photos are my opened set to show details. The giveaway set is still sealed in original packaging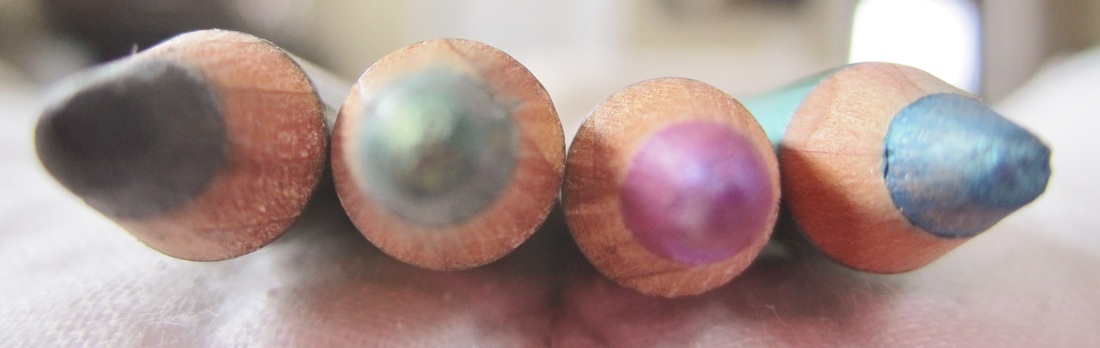 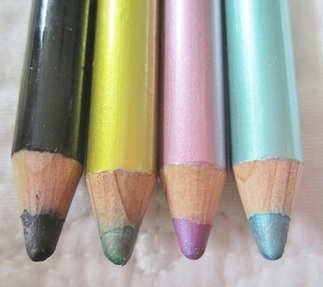 HOW TO ENTER: Click on the "Like Me On Facebook" above my picture on the right side, or click on the Facebook icon on the top right corner of this page, LIKE my page, and type MILANI GIVEAWAY under the comment section of this post on Facebook. Entries are open until June 4. Winner will be selected on June 5, 2013! I will tally up the entries, and use random.org to select the winner. The winner will be contacted through a message on Facebook. From there, I will get your information to send these eyeliners to you. You can purchase these Milani eyeliners HERE for $5.99 each! *** I am not affiliated in any way with other people mentioned or products
mentioned. This is my own personal review on this purchased item*** 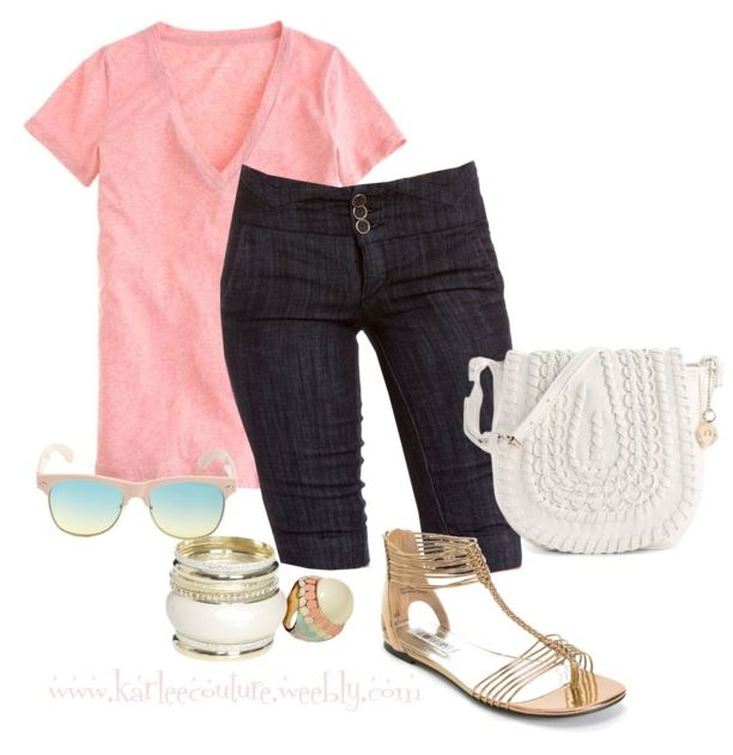 Top: J. Crew Vintage Cotton Tee in Sorbet $24.50
Shorts: 2bstores.com Chevron Waist Bermuda Shorts $20.00 Handbag: DSW.com Big Buddha JSBaker Saddle Flap Mini Cross Body Bag $34.95 Sunglasses: Charlotterusse.com Ombre Lens Half-Frames $5.99 Bracelets: Wetseal.com Large Marble Patina Bangle Set $12.50 Ring: Piperlime.com Cabochon Pastel Painted Ring $22.00 Sandals: Kohls.com Jennifer Lopez Gladiator Sandals $24.50 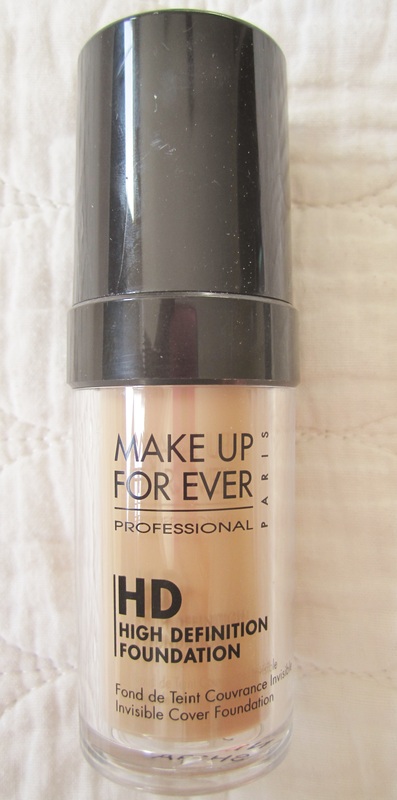 Make Up Forever HD Foundation in N120 1.01 oz This is the best foundation I have ever used hands down!!! I have owned MAC, Covergirl, Pur Minerals, Maybelline, Revlon foundations, and I have heard so many good things about the Make Up Forever HD foundation. It's a fairly new brand to the market, but there has been so much hype about this foundation and other products in the brand as well. I didn't want to try it because it is a little bit pricey, but I was not happy with my current MAC Mineralize foundation that was not supposed to clog pores, but every time I wore it, a new zit would appear. The MAC foundation was a little dewy, which is not my favorite look. Completely matte is not my favorite look either. Somewhere in the middle is what I prefer. I decided to give the Make Up Forever foundation a go. I usually wear the shade NC20 in MAC, and N120 is the equivalent to that shade. Fair-skinned color with slight yellow undertones. The formula is not as thick as some other formulas, but that helps to create a smooth coverage. A little bit goes a long way, and you can build the coverage as much as you would like. If you don't like full coverage, you can just smooth on a little, or you can smooth on a lot for full coverage. It creates such a flawless look that is amazing! My current foundation routine: I always put a primer on my skin before I apply foundation, than I pump about 4 full pumps on the back of my hand and use a MAC 130 stippling brush to dip in the foundation and do small circles on my face starting underneath my eyes and working around my face clockwise. * For a full-coverage look, I will pump 4 or 5 full pumps on the back of my hand and use my finger to dot the foundation spaced very close together in an area of my face and than work the brush in * I always work it into my neck and a little on my chest, because I don't have an evenly colored chest. Once the foundation is applied I will put a concealer on under my eyes and other problem areas. From there I will put a finishing powder on for staying power. My husband always mentions how pretty my skin looks with this foundation. It is an in-between to a matte and dewy look, and I would highly recommend it to anyone! Make Up Forever has a start-up kit that comes with the foundation. a really nice brush (really good reviews on it, I don't have it yet), finishing powder and primer all-in-one which is really the best deal! I wanted to try the foundation first to see if I liked it before I got the kit, but next time, I am getting the kit for sure! 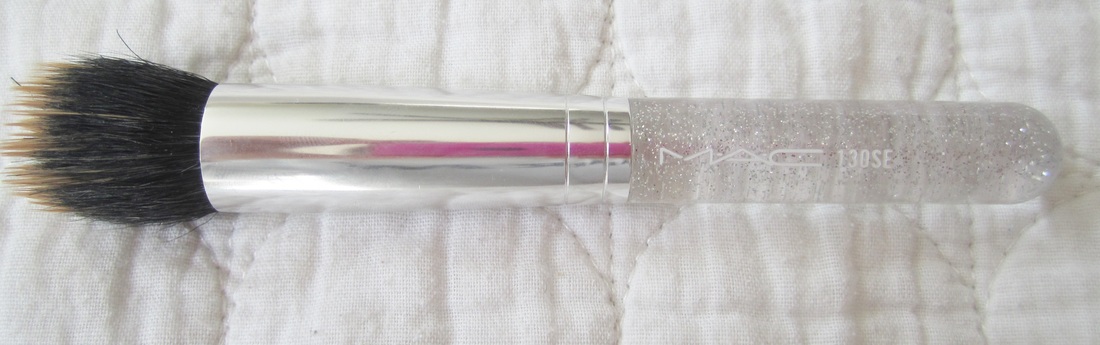 MAC 130SE Brush. This was from a holiday collection, but you can get the regular 130 brush still. 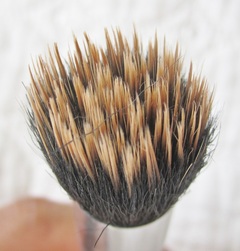 My Rating on Make Up Forever HD Foundation: A+ My Rating on MAC 130 brush: A- (It tends to shed a bit) You can purchase the foundation HERE for $42.00 OR the start up kit with primer, foundation, brush, finishing powder (BEST DEAL) for $79 with free shipping HERE (Normally a $115 value) You can purchase the MAC 130 brush HERE for $42 with free shipping *** I am not affiliated in any way with other people mentioned or products
mentioned. This is my own personal review on this purchased item*** Sorry for not posting yesterday, I had a pretty busy day yesterday So.... self tanners...... I own a ton of them! I use to worship the sun, until all of the moles starting appearing (since I am very fair-skinned naturally) and also since I have a big history of relatives having cancerous moles removed, including my older sister who has skin similiar to mine. Instead of using tanning beds, I use self-tanners, and an array of tools to get it just perfect. 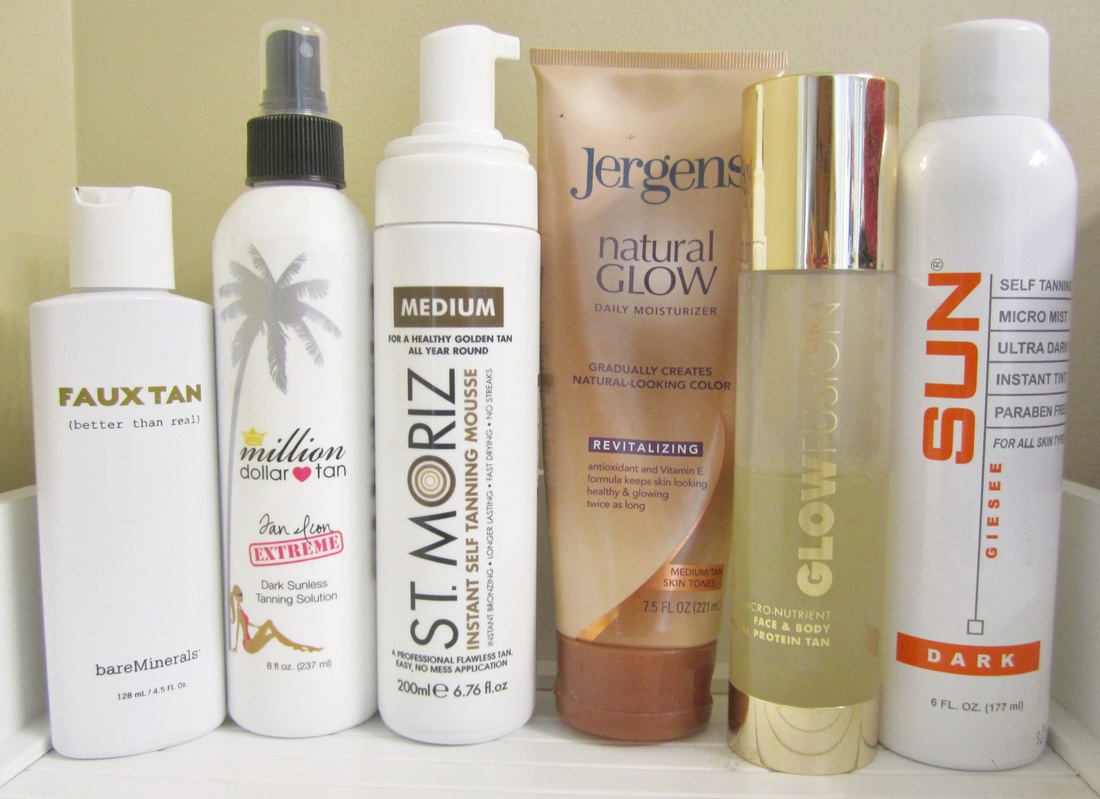 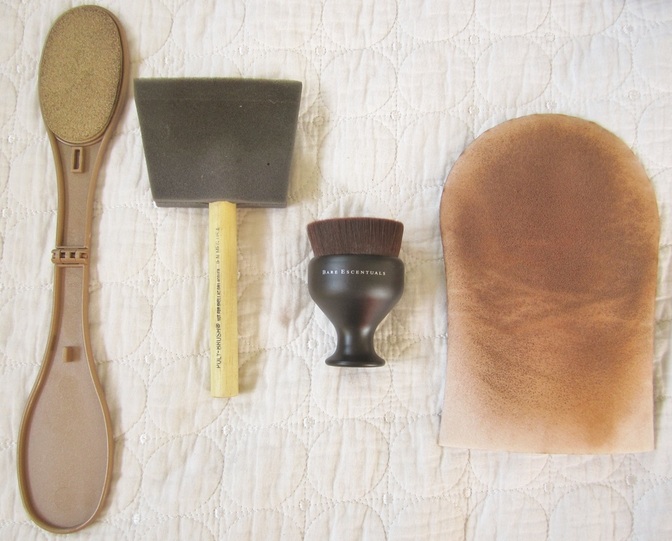 Bare Minerals Faux Tan 4.5 oz. - This tan has a flip top that disperses a greenish-brown lotion type substance when squeezed. The formula comes out nice and spreads easily. It has an instant color to see where it was applied. The smell is not as bad as others, and the tan is nice. Not a very strong tan. It's almost like a subtle glow in my experience. It was fairly expensive for as little as I got, the way better deal is for the 16 oz, and it comes with the kabuki brush. I paid about the same for the brush and the 4.5 oz. I will have a link below for the best deal. The kabuki brush that is sold with it is so nice! It's so soft, but I used this to apply the tan to my whole body, and it took way too long! I mainly use this brush to apply tan to my face, or buff out uneven areas after I have applied it to ensure even coverage. Rating: B+ for faux tanner A- for the buffing brush as described in it's use above Purchase HERE $56.00 for 16 oz tan and kabuki brush Million Dollar Tan Icon EXTREME 8 oz. - I saw a fashion blogger/youtuber endorsing this product, and it seemed to be so easy to apply in here videos. It has a cheap-looking packaging, but that doesn't matter. The product and formula are what matters. It comes with the 4" crafting toll paint brush. You can spray this on the brush itself, or on your skin. I like to spray it on the brush itself, and you paint it on. The brush used was really messy and created a whole bunch of unwanted streaks even applying it. It applies nice and dark so you can see where it was put on. It has a nice smell as well. The color, once mature is a really nice tan color. I felt as though it didn't last as long as others I have had before, I wouldn't apply it with the brush given with it. My favorite applicator with ANY self-tanner is the St. Tropez Tanning Mitt. Rating: A- for the self-tanner C for the crafting brush Purchase HERE with the best deal of the face and body spray tan $43.40 St. Moriz Medium Instant Self Tanning Mousse 6.76 oz. - This stuff is AMAZING! By far my favorite, and it just so happens to be the cheapest! Paired with the mitt, this stuff goes on flawless, and smells the least like tanning lotion out of all of them! It comes with a pump to disperse mousse. I push the head into the mitt and shake it before I pump it every time. I do that so that the mousse is not flying out everywhere. I pump it two or three times into the mitt, and start rubbing it on. It is instantly dark, and does not streak during application. I almost never get streaks when the color matures with these two things paired together. You can build the color to what you want. It's actually pretty dark for only one layer. The tanning wand in the tools picture is supposed to do your back, and I do use it sometimes, but it's not great at all. Just stick with the mitt. The photo below does not do justice to show the color difference with St. Moriz 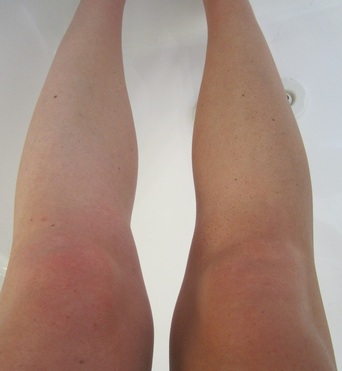 Rating: A+ for the tanner and the mitt. They even have tiny mitts for the face Purchase HERE for the St. Moriz Self Tanner $8.20 Purchase HERE for the St. Tropez Tanning Mitt $6.25 St. Jergens Natural Glow Daily Moisturizer 7.5 oz - This is a daily lotion that adds tan gradually. I don't like the smell of the formula, and it doesn't apply very easily. I get streaky with this. The smell is probably the worst out of all of them. That dreaded tan smell! It's not my favorite for a moisturizer either. Not my favorite product. Rating: D You can purchase this at any drugstore or grocery store for about $5 FusionBeauty GlowFusion Face & Body Mineral Protein Tan 5 oz. - This tan is a spray in a very nice-looking bottle. This tanner used to be REALLY expensive (like $60), but you can find it on eBay now for extremely cheap ($8)! I used this on my body once and it was streak city! I use this for my face because it is non-comodegenic and does not clog my pores on my face and chest. I spray it liberally and use the bareminerals kabuki tan brush to make sure it is spread nicely. The smell is decent coming out. This is a gradual, non-instant tan. It takes a few hours for the color to mature, but I am never worried since it is a small area to cover, it never streaks. The color is a little more orange than I would like, but after I put makeup on my face, it evens out the color. I love this for my face, and nothing else. Rating: A- for use on my face C- for the use on my body You can purchase HERE for GlowFusion $7.96 Sun by Giesee Self-Tanning Micro Mist Ultra Dark Instant Tint Paraben Free 6 oz. - I have this spray as well as the lotion self-tanner. This used to be my favorite, until I discovered St. Moriz. The color is a really deep dark color that is REALLY nice! I like to spray my skin and use the mitt to spread it. The mist is too fine to spray right on the mitt. The only downside to this self-tanner is that the smell is pretty strong when the color matures, but I dare anyone to claim that there is a self-tanner out there that does not even have a hint of that self-tanner smell. I mainly stick with St. Moriz, but I do use this one as well. It's nice to know that it is paraben-free, and rid of some chemicals. Rating: A You can purchase HERE for Sun by Giesee $19.95 Some tried and true tricks to a great faux tan! Exfoliate beforehand with a scrub in the shower, and don't rub too hard, or else your skin will be irritated. Start in a discreet area that won't be seen until you get the hang of applying Put a really moisturizing body butter on your knees, elbows, hands and ankles before you apply, and don't apply product directly to these areas. Before you re-load your mitt, use the residual on these areas, because they will soak up more than you want, and you will have darker knees, elbows, etc... than you want. Don't forget your ears, and behind your ears, and on the back of your neck If you do use your hands to rub in self-tanner, use a really rough nail brush and dawn soap and scrub it off your hands afterwards that way. Wear loose clothing for a bit to let it dry for at least an hour before you put on regular clothes. It will rub off on your clothes, and it usually washes out, but it can stain. Sitting in a hot tub or steam room will cause your tan to quickly disappear. It's not about the fact that the product is a mousse, spray, lotion, it is all about application tools and techniques! Hopefully that helps a bit! These are just things I do to make it work for me. You may have different preferences. *** I am not affiliated in any way with other people mentioned or products
mentioned. This is my own personal review on this purchased item*** |
|


 RSS Feed
